A CFO dashboard is only as useful as the expense data behind it. If receipts arrive late, categories are inconsistent, or spreadsheet columns change from month to month, the dashboard becomes a guessing tool instead of a decision tool. A simple receipt to CFO dashboard workflow fixes that by turning everyday receipts into clean, reviewable data your finance lead can trust.
This workflow is designed for small businesses, fractional CFOs, bookkeepers, and operators who still rely on spreadsheets for reporting. You do not need a heavy finance stack to get better visibility. You need a repeatable process for capturing receipts, extracting the right fields, reviewing exceptions, and exporting the data in a format your dashboard already understands.
Capture receipts before they disappear
The first phase is receipt capture. This is where most reporting issues begin, because receipts often live in too many places: email inboxes, phone photos, paper folders, payment apps, and team chat threads. The goal is to create one clear intake path so receipts do not get lost before month end.
For a small team, the capture process can be straightforward:
- Ask team members to upload receipts as soon as purchases happen.
- Save email receipts as PDFs or images instead of leaving them buried in inboxes.
- Use a consistent file naming pattern when possible, such as vendor, date, and amount.
- Keep reimbursable expenses separate from company card expenses.
SlipSheet helps here by giving you a practical place to convert receipts into spreadsheet-ready data. Instead of copying totals and vendor names by hand, you can upload the receipt and move quickly into review.
Extract the fields your dashboard actually needs
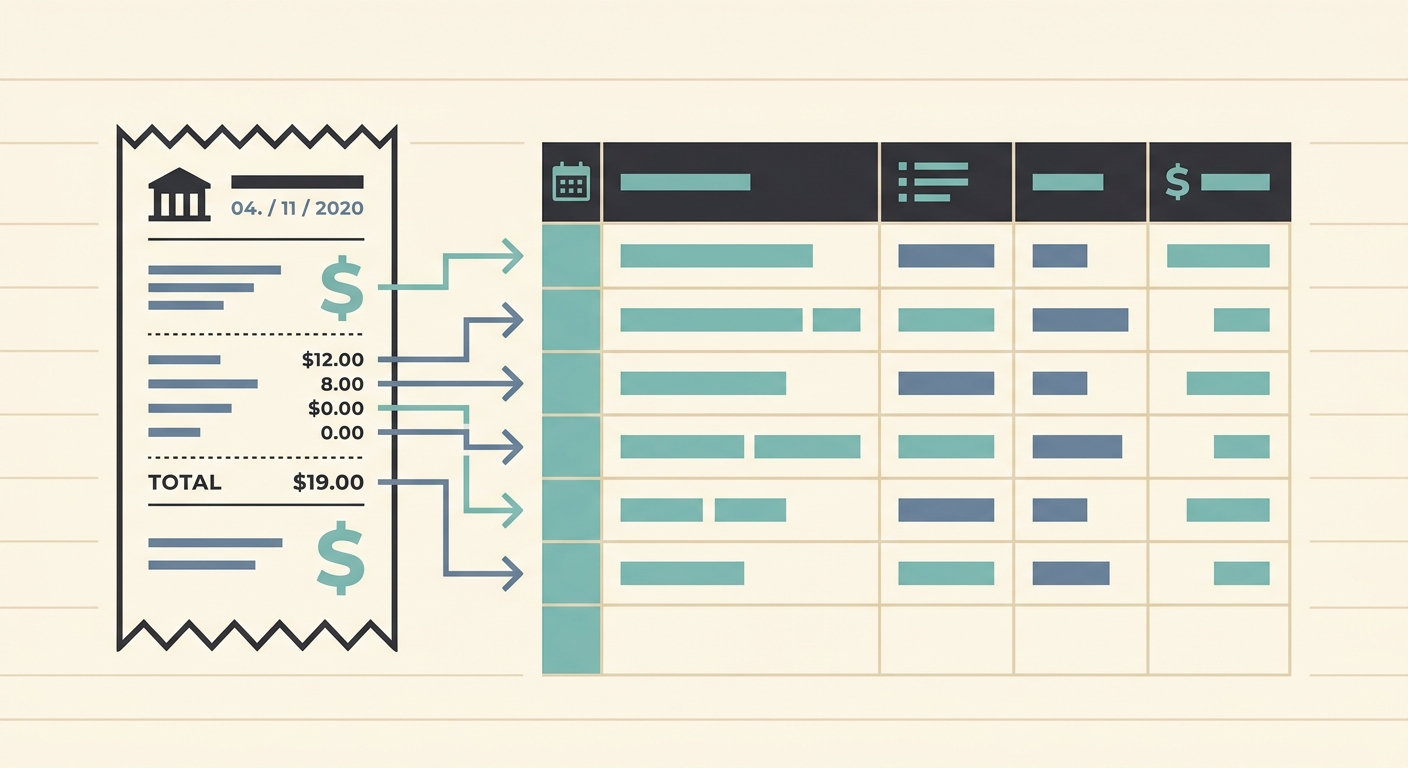
Once receipts are captured, the next step is extraction. A CFO dashboard usually does not need every line of text on a receipt. It needs the fields that drive reporting, such as vendor, transaction date, total, tax, currency, payment method, category, and notes.
Before you process a batch, decide which fields matter for your dashboard. A simple dashboard might only track spend by month, vendor, and category. A more detailed dashboard may also track department, client, project, reimbursable status, and location. The key is to avoid collecting data you will never use, because unused fields slow down review and create more opportunities for inconsistent entries.
SlipSheet can extract receipt fields into a spreadsheet-friendly structure, which makes it easier to feed downstream reporting. You still need human review for business context, but you should not need a human to retype every date, vendor, and total.
Review categories, tags, and exceptions
The review phase is where raw receipt data becomes CFO-ready data. Extraction can capture the facts on the receipt, but business meaning often comes from your chart of accounts, internal tags, and reporting rules.
During review, check each receipt for three things:
- Accuracy: Confirm the amount, date, vendor, and tax are correct.
- Classification: Assign the right category, department, client, project, or location.
- Completeness: Flag missing receipts, unclear purchases, duplicate uploads, or expenses that need approval.
This is also the best time to create consistent naming rules. For example, decide whether the vendor should be recorded as "Amazon", "Amazon Business", or "Amazon Marketplace". Your dashboard may treat those as separate vendors if the names vary, which can distort vendor concentration and spending trends.
For recurring reports, maintain a short review checklist. It should include common exceptions, category rules, and any dashboard-specific requirements. This reduces back-and-forth between the bookkeeper, owner, and CFO.
Export clean data to your preferred reporting tool
After review, export the receipt data to the tool that powers your dashboard. That might be Google Sheets, Excel, Airtable, QuickBooks data exports, Looker Studio, Power BI, or another spreadsheet-based reporting setup. The important part is consistency. Your export should use the same columns, date format, category names, and currency rules every time.
A reliable export table often includes:
- Receipt ID or file name
- Transaction date
- Vendor
- Total amount
- Tax amount
- Currency
- Payment method
- Expense category
- Department, client, or project tag
- Reviewer status
Once the export structure is stable, your dashboard can refresh faster and with fewer manual fixes. You can build views for monthly spend, budget variance, vendor trends, reimbursement totals, category drift, and cash impact without rebuilding the data model each time.
Getting started with a repeatable workflow
Start small. Pick one month of receipts and define the minimum fields your CFO dashboard needs. Process that month from capture through export, then compare the results against your current reporting process. Look for time saved, fewer missing receipts, fewer category corrections, and faster dashboard updates.
A practical starter workflow looks like this:
- Create one folder or intake location for receipt uploads.
- Use SlipSheet to extract receipt data into a spreadsheet-ready format.
- Review totals, dates, vendors, and categories before export.
- Add dashboard tags such as department, client, or project.
- Export the clean table to the spreadsheet or BI tool that powers your CFO dashboard.
After one successful month, document the process and repeat it. The value comes from consistency, not complexity.
Common pitfalls to avoid
The biggest mistake is trying to build the dashboard before the receipt workflow is stable. If the inputs are messy, the dashboard will require constant repair. Fix the intake, extraction, review, and export steps first, then build charts on top of clean data.
Another common issue is over-tagging. More tags can be useful, but only if someone reviews them and uses them in reports. If your team cannot explain the difference between two tags, combine them. Simpler reporting rules usually produce better compliance.
Finally, do not skip review just because extraction is fast. Automated extraction reduces typing, but review protects the quality of the financial story. A CFO dashboard should help leaders make decisions, and decisions need clean inputs.
If you want a faster path from receipts to spreadsheet-ready reporting, try SlipSheet. It helps turn receipt uploads into structured data you can review, export, and use in the CFO dashboard your business already depends on.
FAQ
What is a receipt to CFO dashboard workflow?
It is a repeatable process for capturing receipts, extracting key fields, reviewing categories, and exporting clean data into the spreadsheet or reporting tool behind a CFO dashboard.
Do I need accounting software to use this workflow?
No. Many small businesses can start with a receipt extraction tool, a spreadsheet, and a clear review process before connecting the data to accounting or BI software.
Which receipt fields should I include in the dashboard export?
Start with vendor, date, total, tax, currency, payment method, category, and any reporting tags such as department, client, or project.
How often should receipt data be updated for CFO reporting?
Weekly is a good rhythm for most small teams, while high-volume businesses may prefer daily updates to keep cash and spend dashboards current.
Can SlipSheet replace manual receipt entry?
SlipSheet can reduce manual typing by extracting receipt data into a spreadsheet-ready format, but you should still review categories and exceptions before using the data in financial reports.