
How do you organize receipts for an insurance claim? As ledger rows tagged to one claim — not a Drive folder named Claim, and not a four-phase capture tour. Done is every repair invoice, replacement buy, temporary lodging slip, and mitigation charge on one export-ready packet: date, vendor, total, tax, category, source.
After the loss, contractor or small-shop or freelancer mode. The repair invoice PDF is still in email. The hardware-store snap for tarp and lumber is in Camera Roll. The lodging charge is a crumpled slip from three nights away. The mitigation receipt is still in the glovebox. Dumping all of it into a folder labeled Claim is not a packet. When the adjuster asks where the total is, the folder still fails the filter.
One charge equals one row. Claim is a tag (or a category) you filter on, not a second file tree. What the policy covers is between you and the adjuster — this page is the ledger, not coverage advice.
Why a Claim folder is not a claim packet
Folders store files. They do not give you date, vendor, total, tax, or a claim tag as columns you can sort and export. A repair PDF and a lodging slip both belong on the same sheet; the category column carries the claim. A photo of the damage is evidence. It is not a receipt row. The snap can sit next to the replacement row; the row still needs date, vendor, total, and tax you can put in a CSV.
Raw OCR can read the slip and still leave you without a claim-ready row. A local Q2 2026 run on n=20 synthetic receipts (Tesseract 5.5.0) is the useful baseline: vendor hit 95%; date and total hit 100%; tax hit 60%; all four fields correct on only 55% (11/20). Ground-truth sum $2,034.43 matched the OCR-parsed sum. Every receipt still had 2+ currency-like amounts (avg 6.05). OCR pulls digits. You still assign the claim tag on review before export — especially when a roof invoice, a hardware snap, a lodging slip, and a mitigation PDF all sit in the same week.
A worked claim week as ledger rows
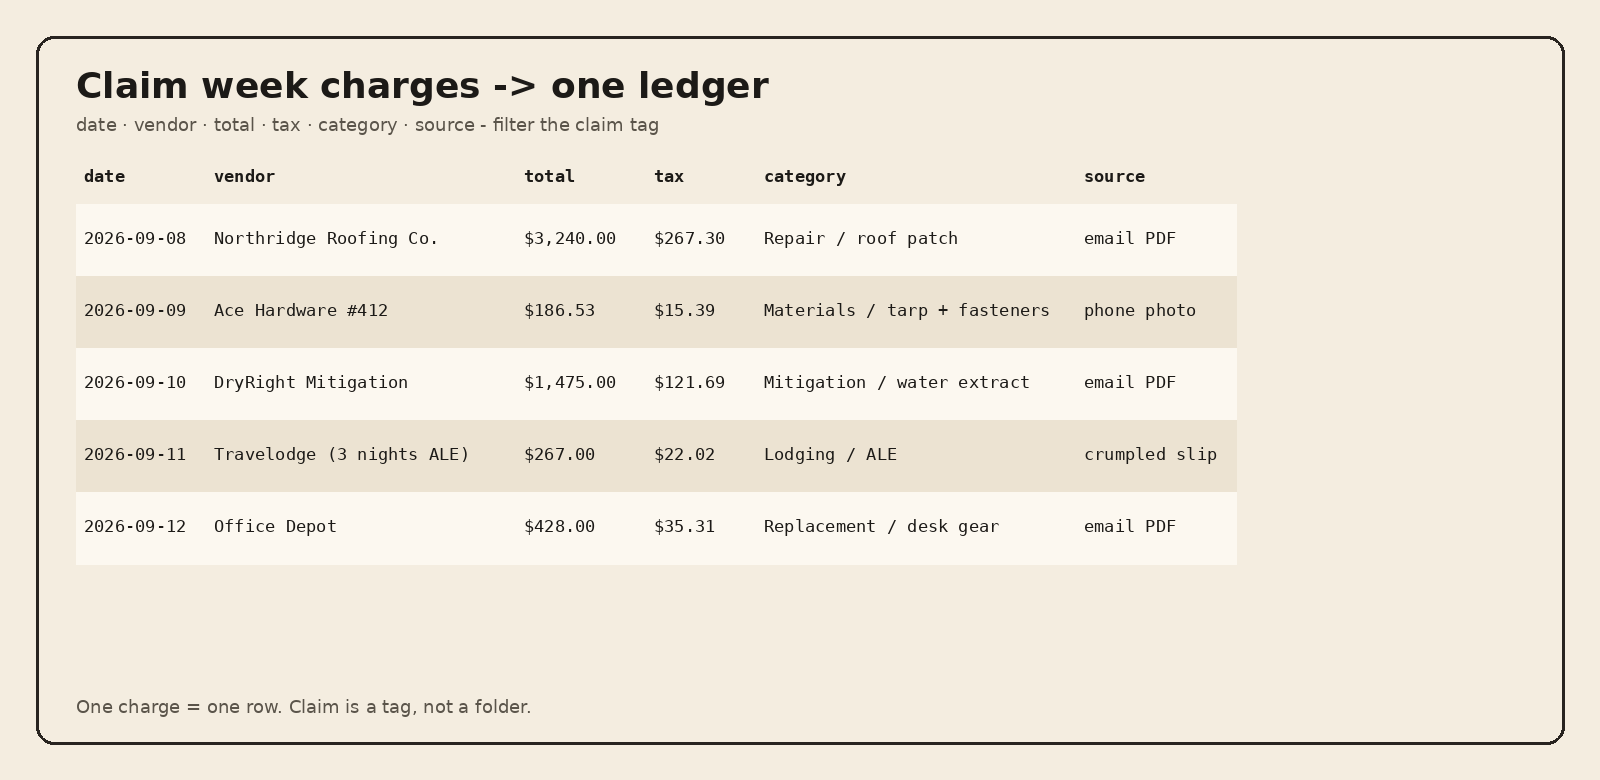
Here is one invented September week for a small shop after water damage. Same six columns every time. Filter the claim tag and the packet stays together. No Claim-folder rename required.
| date | vendor | total | tax | category | source |
|---|---|---|---|---|---|
| 2026-09-08 | Northridge Roofing Co. | $3,240.00 | $267.30 | Repair / roof patch | email PDF |
| 2026-09-09 | Ace Hardware #412 | $186.53 | $15.39 | Materials / tarp + fasteners | phone photo |
| 2026-09-10 | DryRight Mitigation | $1,475.00 | $121.69 | Mitigation / water extract | email PDF |
| 2026-09-11 | Travelodge (3 nights ALE) | $267.00 | $22.02 | Lodging / ALE | crumpled slip |
| 2026-09-12 | Office Depot | $428.00 | $35.31 | Replacement / desk gear | email PDF |
The roof invoice and the glovebox lodging slip are both rows. The date column is how the week shows up. Category is how you (or your bookkeeper) can hand the adjuster one export — a column on the row, not a second pile of PDFs.
Slipsheet turns photos and PDFs into rows you review, with a claim tag on the row, then a CSV or Sheets file you own. Photo, PDF, or forward to receipts@slipsheet.app. Starter is $5/mo for 250 receipts; Pro is $12/mo for 1,500. Fourteen-day trial, no card. Soft land only: open the ledger, filter the claim tag, export the packet.
Damage photos and receipt rows are different jobs
A photo of the wet ceiling documents the loss. A receipt row documents what you paid to fix, replace, mitigate, or lodge. Keep the damage snap next to the matching replacement or repair row if that helps the adjuster. Do not pretend the snap is the total. The row still carries date, vendor, total, and tax.
A few straight answers
How do I organize receipts for an insurance claim?
Put each charge on a row with date, vendor, total, tax, category (or claim tag), and source. Filter the claim tag. Keep the PDF or photo as evidence pointed to by source — not as a second Claim folder.
What should be in an insurance claim receipt packet?
Every repair, materials, mitigation, lodging, and replacement charge as exportable rows. One packet the adjuster (or your bookkeeper) can open — not a tour of adjuster software, and not coverage advice.
Is a photo of the damage enough for the claim?
No. Damage evidence and receipt rows do different work. The snap can sit beside the replacement row; the row still needs the money fields you can export.
Do lodging and mitigation need a different workflow than a repair invoice?
No. Same six columns. Email PDF, phone photo, or crumpled slip lands in source. Claim versus personal spend is visible in the category you assign — not in a separate Capture→Export pipeline.